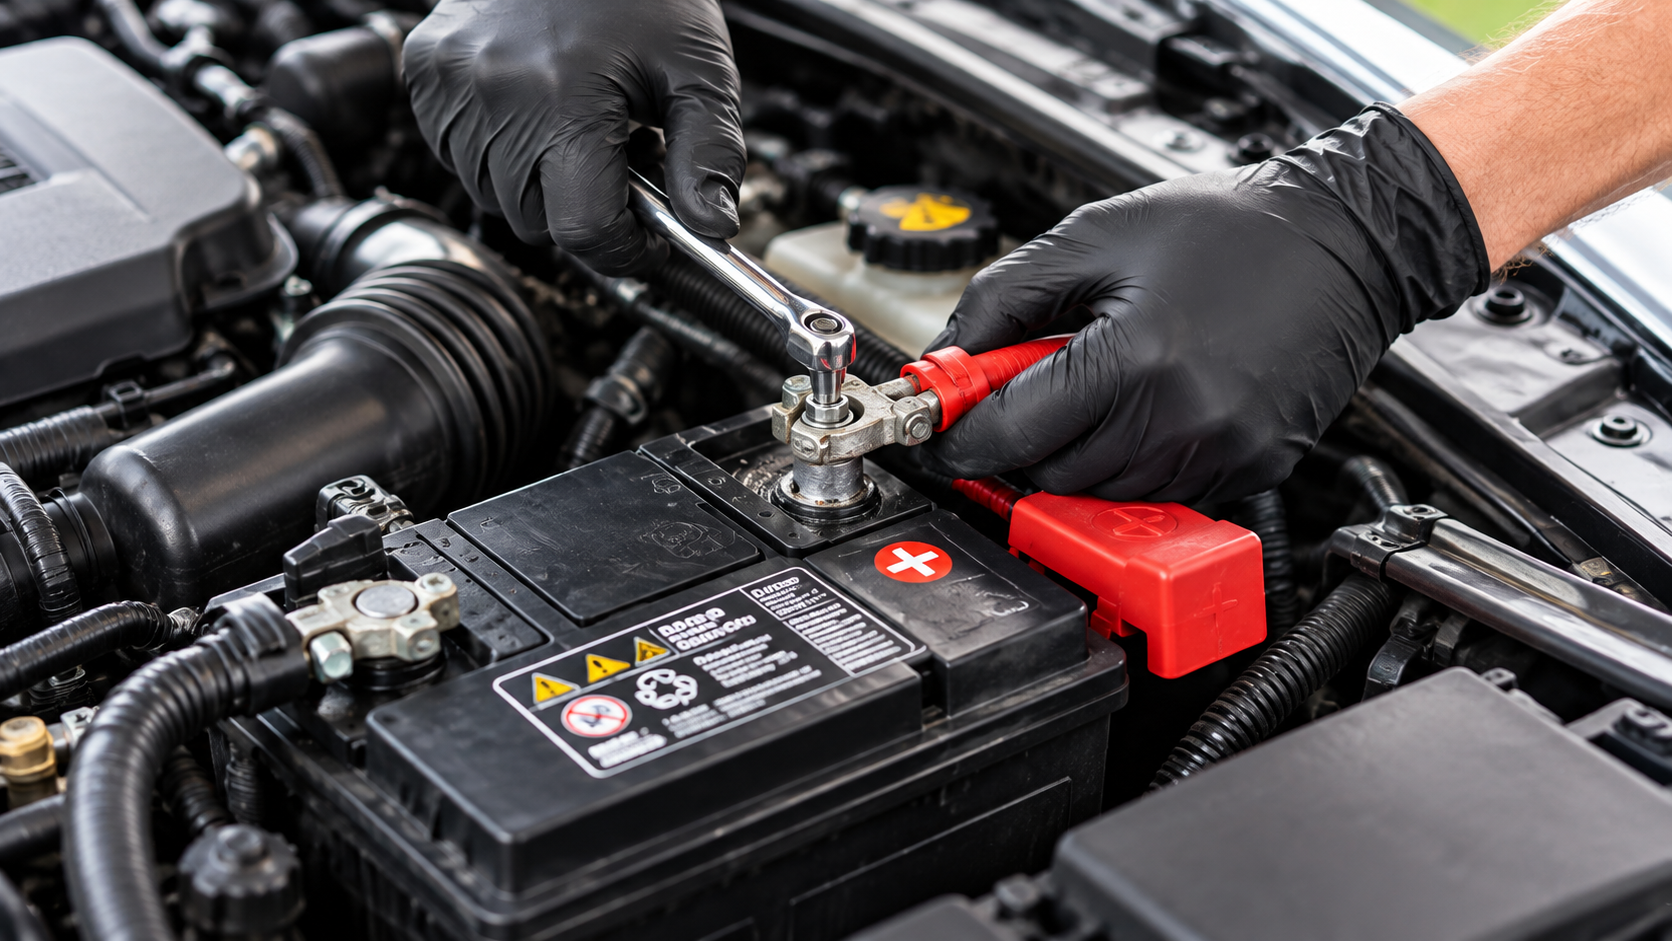

How to Disconnect and Connect a Car Battery Properly in Easy Way
Learning “how to disconnect and connect a car battery” can help when replacing an old battery, carrying out maintenance or preparing for certain electrical work. Although the process is straightforward, using the wrong terminal sequence can cause short circuits or damage sensitive electrical components.
Modern vehicles often have more advanced electrical systems than older cars. Disconnecting the battery may reset stored settings, trigger warning messages or require recalibration, coding or battery registration after replacement. Always check your vehicle’s specific instructions before starting.
For luxury vehicles, additional electrical systems can make battery work more complex. ARMotors provides luxury car repairs and automotive diagnostics in Dubai and across the UAE for vehicles requiring professional inspection, fault diagnosis or electrical system support.
Essential Tools for Disconnecting and Connecting a Car Battery
You only need a few basic tools for most car battery jobs. Prepare the following before getting started:
- Correct Size Wrench: Use the right size for the battery terminal fasteners.
- Socket Set: A suitable socket can make loosening and tightening easier.
- Protective Gloves: Protect your hands while handling the battery and terminals.
- Safety Glasses: Shield your eyes from corrosion, debris or accidental battery fluid exposure.
- Terminal Cleaning Brush: Use one when light corrosion or buildup needs to be removed.
- Terminal Protection: Use suitable covers where required to prevent accidental contact after disconnection.
- Use the Right Fit: Never force an incorrectly sized tool onto a terminal fastener. A secure fit helps prevent damaged nuts, terminals and accidental contact with surrounding metal.
Start Here Before You Touch the Battery
Preparation reduces unnecessary risks and helps you understand what your vehicle requires.
- Secure the Vehicle: Park on a level, stable surface and apply the parking brake before starting any battery work.
- Switch Off Power: Turn off the engine, lights, climate controls, infotainment and all other electrical accessories before touching the battery.
- Keep Key Away: Remove the key and keep it away from the vehicle where the manufacturer’s instructions recommend doing so.
- Allow Systems Shutdown: Allow the vehicle’s electronic systems to shut down fully when the manufacturer’s instructions require a waiting period.
- Read Manual First: Read the owner’s manual for vehicle specific battery removal instructions, precautions and any required replacement procedures.
- Locate Battery Securely: Confirm the battery location and check how its retaining bracket or clamp keeps it securely in place.
- Wear Proper Protection: Wear suitable protective gloves and safety glasses to reduce exposure to corrosion, debris or accidental battery fluid contact.
- Avoid Ignition Sources: Keep flames, cigarettes, sparks and other ignition sources away from the battery throughout the entire job.
- Check Battery Condition: Inspect the battery for cracks, swelling or leakage before attempting to disconnect its terminals or remove it.
A battery may sit under the bonnet, inside the trunk or beneath a seat, depending on the vehicle. Some cars also use battery monitoring sensors or additional batteries, so do not assume every vehicle follows the same procedure.
The Correct Battery Disconnect Sequence
For most conventional vehicles, the safe sequence is negative first, then positive. Always give the owner’s manual priority if it specifies a different procedure.
Step 1. Power Everything Down
Switch off the engine and all electrical equipment before opening the battery compartment. Do not attempt battery removal while the engine is running.
Step 2. Find and Identify the Battery
Locate the battery and identify its terminals. Look for the plus and minus markings on the battery rather than relying entirely on cable colour. The positive terminal is marked with a plus symbol, while the negative terminal is marked with a minus symbol.
Step 3. Remove the Negative Connection
Disconnect the negative battery terminal first. Loosen the terminal fastener and carefully lift the connection from the battery post. Keep the cable positioned away from the terminal so it cannot accidentally reconnect while you are working.
Step 4. Remove the Positive Connection
Once the negative connection is safely separated, disconnect the positive terminal. Take particular care with your wrench or socket. Do not allow the tool to touch the positive terminal and nearby metal at the same time.
Step 5. Release the Battery Retainer
Before lifting the battery, remove its securing bracket, clamp or hold down. The battery should never be lifted while it remains firmly restrained.
Step 6. Lift the Battery Carefully
Car batteries can be surprisingly heavy. Lift using a stable grip and keep the battery upright during removal. If you notice leakage, cracking, swelling or serious physical damage, stop rather than continuing with the removal.
Reconnecting the Battery Without Creating Problems
Installing a battery requires the opposite terminal sequence.
Step 1. Position the Battery
Place the battery in its correct location and make sure it sits properly. Secure the hold down before reconnecting the electrical terminals.
Step 2. Attach Positive First
Connect the positive battery terminal first and tighten it securely. Avoid excessive force that could damage the terminal or fastener.
Step 3. Attach Negative Second
Connect the negative terminal after the positive connection is secure. Tighten it enough to prevent movement without overtightening.
Step 4. Check the Installation
Confirm that both terminals are secure and correctly positioned. Check that the cables are routed safely and that the battery cannot move inside its mounting area.
Step 5. Turn the Vehicle On
Start the vehicle and observe the instrument cluster. Check the lights, windows, central locking, infotainment and climate controls where applicable. A vehicle starting normally does not automatically confirm that every electronic system is operating correctly.
Why Does Battery Terminal Order Matter
Battery terminal order helps reduce the risk of accidental short circuits while working around the vehicle’s electrical system. Disconnecting the negative terminal first isolates the battery from the vehicle body before the positive connection is removed.
When reconnecting, attach the positive terminal first, followed by the negative. This is the standard sequence for many 12 volt vehicles, but always follow your manufacturer’s instructions.
What Changes After Battery Power Is Lost
Disconnecting a battery can cause temporary changes to vehicle settings and electronic functions. The exact effects depend on the make, model and electrical architecture. Possible changes include:
- Clock and date resetting
- Radio settings being cleared
- Infotainment preferences being lost
- Power window memory requiring calibration
- Steering or other system calibration being required
- Warning messages appearing
- Anti theft related settings being affected
- Battery management functions needing attention
- Start stop functions behaving differently until the system adapts
Not every vehicle experiences these changes. If a warning remains after reconnection, follow the manufacturer’s instructions instead of assuming the message will disappear automatically. For battery health information, you can also read ARMotors’ guide on when to replace a car battery and its warning signs.
Luxury Cars Need Extra Attention
Luxury vehicles often combine sophisticated electronics with tightly integrated control systems. A battery replacement on a BMW, Mercedes Benz, Audi, Porsche, Range Rover, Jaguar, Bentley or Maserati may therefore involve more considerations than simply fitting a battery that physically fits.
Some vehicles use AGM batteries, while others may use EFB technology. Start stop systems can also place different demands on the battery and charging system. Depending on the vehicle, you may encounter:
- Battery monitoring systems
- AGM or EFB battery requirements
- Auxiliary batteries
- Battery registration
- Battery coding
- Electronic memory settings
- Vehicle specific diagnostic procedures
These requirements are not universal. The correct procedure depends on the vehicle’s specification and manufacturer instructions. If battery replacement is followed by persistent electrical warnings or unusual system behaviour, professional diagnostics can help determine whether the issue involves the battery, charging system, wiring or another electronic component.
ARMotors offers mechanical and electrical repair services and advanced diagnostics for luxury and performance vehicles in Dubai and across the UAE |
Signs You Should Stop the DIY Process
A damaged battery or damaged electrical wiring requires more care than a straightforward battery replacement. Don’t continue if:
- The battery is leaking, cracked or swollen.
- Battery terminals are severely damaged.
- Wiring appears burnt or melted.
- You notice a strong electrical smell.
- Multiple warning lights remain after installation.
- The correct battery specification cannot be confirmed.
- The battery is difficult or unsafe to access.
- The vehicle requires a procedure you cannot verify.
Common Battery Connection Mistakes
- Wrong Disconnect Order: Removing positive before negative increases the chance of an accidental short.
- Wrong Reconnect Order: Connect positive before negative during normal battery installation.
- Engine Left Running: Battery connections should not be removed with the engine running.
- Tool Bridging Terminals: Keep tools from contacting a terminal and metal bodywork simultaneously.
- Unsecured Battery: Always reinstall the original hold down correctly.
- Incorrect Battery Type: Match the required battery technology and specification.
- Overtightened Terminals: Secure connections without applying unnecessary force.
- Ignored Warnings: Investigate persistent warning lights instead of assuming they are harmless.
- Skipped Instructions: Manufacturer guidance should take priority over generic procedures.
- Missed Registration: Check whether the vehicle requires battery registration after replacement.
How to Choose the Correct Replacement Battery
A replacement battery should not be selected only because it fits the available space. Check the vehicle’s:
- Make and model
- Model year
- Engine
- Battery technology
- Capacity
- Cold cranking requirements
- Physical dimensions
- Terminal arrangement
- Manufacturer specification
- VIN where required
This matters particularly with modern luxury vehicles because the battery forms part of the wider charging and electrical system. An incorrect specification can create compatibility or charging problems.
For broader vehicle maintenance information, see the existing ARMotors guide on car battery replacement warning signs.
When Professional Luxury Car Repair Makes More Sense
DIY battery work can be reasonable when the procedure is clearly documented and the battery is safely accessible. Professional assistance becomes more appropriate when the vehicle uses complex battery management technology or requires registration and coding.
- Consider professional diagnostics when multiple warning lights appear, electrical systems fail to return to normal, battery access is complicated, the correct battery type is uncertain or the vehicle has advanced start stop technology.
- A diagnostic check can also help determine whether the battery is actually the cause.
- Weak alternator, poor connection or another electrical fault can produce similar symptoms.
For more information about available diagnostic services, see car scanning diagnostic services.
Need Help With Your Luxury Car’s Electrical System? Contact Us
If your luxury vehicle develops warning lights, electrical faults or battery management issues after replacement, professional diagnostics can help identify the underlying cause. ARMotors provides luxury car repairs and automotive diagnostics in Dubai and across the UAE.
Professional assistance can also be appropriate when battery registration, coding, complex access or vehicle specific procedures are required. Get the electrical system checked when the correct procedure cannot be confirmed or the vehicle does not return to normal operation.
Frequently Asked Questions
For most conventional vehicles, disconnect the negative terminal first and the positive terminal second. This sequence reduces the chance of creating an accidental short between the positive connection and the vehicle body while working around the battery.
Yes, battery power loss can reset settings such as the clock, radio preferences or window memory on some vehicles. Certain cars may also require calibration or other procedures after reconnection. The exact effects vary by vehicle and should be checked in the owner's manual.
When installing a typical 12 volt car battery, connect the positive terminal first and the negative terminal second. Make sure the battery is secured before connecting the terminals and follow the vehicle manufacturer's procedure if it specifies a different sequence.
Consider professional assistance if warning lights remain, electrical functions behave unusually, the vehicle requires battery registration or coding, or you cannot confirm the correct battery procedure. ARMotors provides luxury car repairs and automotive diagnostics in Dubai and across the UAE.
Final Thoughts on Safe Battery Connection
Safe battery work starts with preparation. Switch everything off, identify the correct terminals and follow the vehicle manufacturer’s instructions before removing anything. For most vehicles, disconnect the negative terminal first and remove the positive terminal second. During installation, reverse the order by connecting positive first and negative second. Secure the battery and check the vehicle’s systems after reconnection.
Modern luxury cars can have additional electronic requirements, so do not assume every vehicle responds identically to battery replacement. If the procedure or resulting warning messages are unclear, stop and seek qualified assistance.